Call scheduling

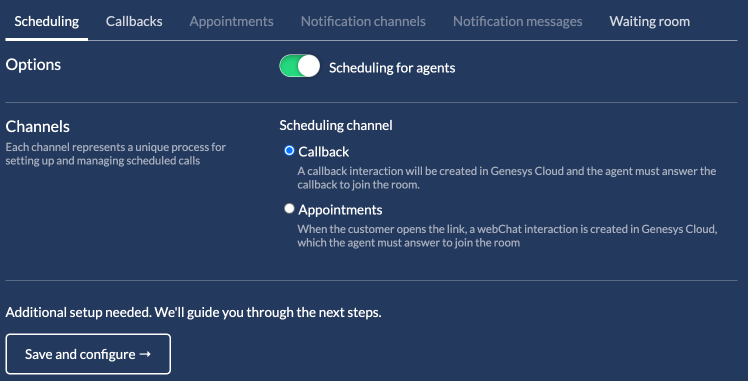
You have the option to enable or disable the scheduling functionality for the agents.
Once you enable scheduling, there are two different channels that are supported.
Callback

This is a Genesys Cloud specific setting that uses the callback interaction.
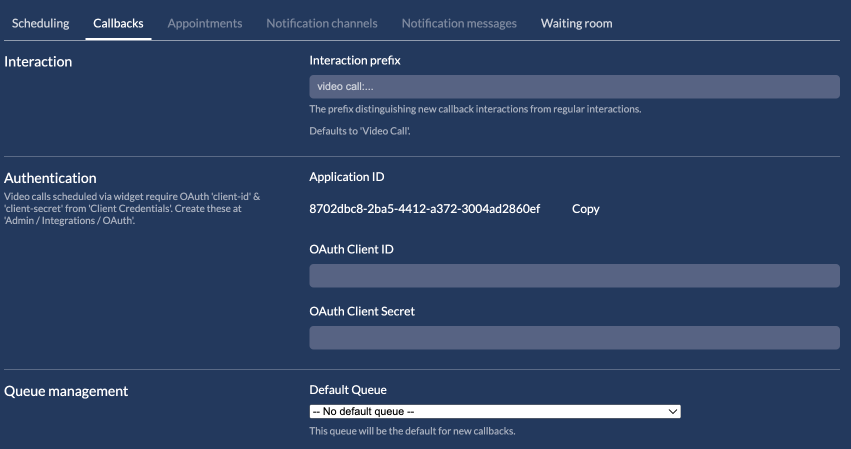
Scheduling a video call in auvious is done via the callback API of Genesys cloud. A callback interaction is created in Genesys Cloud and the agent would have to answer that callback to join the room. You can optionally set a default queue, when the agent is scheduling a new callback.
At that point there is a need to create an OAuth client from Genesys > Integrations > OAuth menu.
- Select Grant Type “Client Credentials”
- On the Roles tab assign the agent role (ex: "Auvious Agent") that you created in the Pre-setup process
SMS / Email message
You can change the default message that is send when an agent shares the link via SMS or email.
Visit 'Notification messages' and you you will see the default email and SMS messages. Click the edit button to change them. You can use HTML in the email message.

Appointments
Scheduling is handled in auvious instead of Genesys and the agents and supervisors can manage all appointments inside auvious. You can configure to either user a Web Chat(v2) or a Web Messaging interaction to route the customer to the agent in a Genesys integration. In Talkdesk we only offer appointments through Digital Connect. Once the time of the appointment arrives and the customer follows the link, an interaction is created in Genesys Cloud and the agent will have to answer that interaction to join the room.
Settings
Read more on the available settings for each channel in the Appointments section.
Waiting room
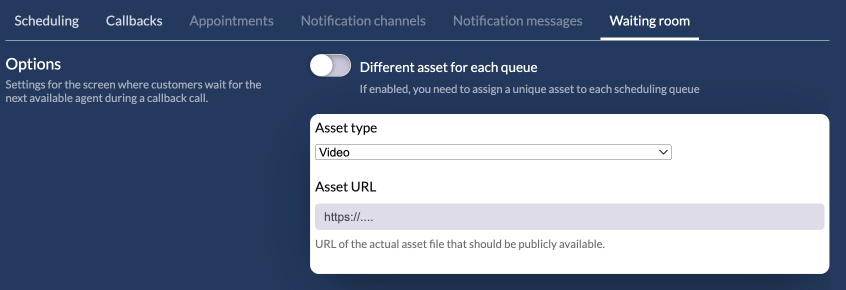
Whether you use callbacks or appointments, the customer will land on a waiting room before they join the call. You can use this page to show a video or an image to the customer, while waiting. If you choose a video, due to browser restrictions, the video will start playing muted. You will have to host the video/image files to your own CDN. We require only the secure URL of the asset.

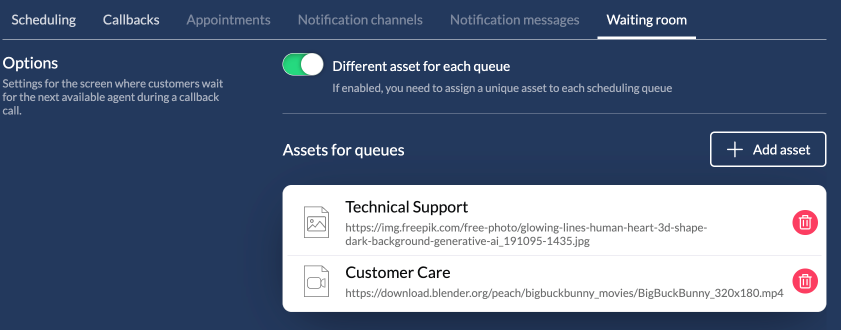
We also offer the ability to have different assets (either video or image) per queue. If you enable this option, you will now be able to add one or more assets. Click on the 'add asset button', select a queue and set the url. Repeat this flow for each queue. Don't forget to Save the changes.
If your business flow is based on appointments which are created by an agent and not by a customer using our widget, you cannot set an asset per queue. This is because an appointment that is created by an agent routes back to the specific agent and not to a queue.
